Divide and conquer

The shelves are now to thickness and cut to width. Some sanding of the end to ensure they fit and they are almost ready to go. I used a router to cut the dadoes in the case and because the bit is round, so is the end of the cut. I could attempt to square off the dado, but that would be difficult. My smallest chisel is 10 mm. I decided to try a different route and round over the edge. I did try to use a router to do the rounder over with a 1/8″ round over bit, but the shelves are too small to do it by hand. The router table wasn’t very effective as I couldn’t reliably get the depth right and anyway the shelves aren’t exactly 1/4″ thick. Then I remembered a video done by Matthias Wandel:

After a little trial and error I found that 3 45º strokes with my block plane, followed by a 22.5º either side of that created a very close round over, which is completed with a little light sanding.

Once the shelves are ready, I positioned them in the cabinet for a dry fit. I drew where the dadoes meet the shelves which give me a start line to mark out where the dividers go. To make sure I get the dadoes in the right places, I used the layout marks from the dadoes and a compass to find the center of the board. I think this must be one of the first times I’ve used a compass for something other than drawing a circle. The layout lines were then used as a reference point to make sure my router was in the right place to cut the dadoes. A 1/4″ v-groove bit has a sharp point and can help position the router on the line so the fence can be zeroed in.

1/4" V Groove bit

Swap the v-groove bit for the 1/4″ straight bit to make the cut and the dadoes are perfectly down the middle of the board. The depth of cut can be determined by dropping the router bit onto the workpiece whilst the motor is off, then placing an appropriate diameter drill bit in the depth stop. I did a couple of test cuts and worked out the best depth. After doing a couple of cuts things when a little wrong. I didn’t realise and cut one of the shelves in half. I didn’t realise until after I’d finished the second cut because of all the dust in the channel. Luckily I had enough stock prepared and was pleasantly surprised at how fast I was able to get a new shelf ready.

As I was finishing up, I managed to get one divider cut and placed in the dry assembly.


Andrew’s _IMG_0891 Andrew’s _IMG_0890 Andrew’s _IMG_0892

Magnetic personality

At some point I managed to knock my tray of 200 odd drill bits on the floor. With all the dust and the incredibly small diameter bits, it was quite difficult to get them all. Until I remembered I had a super strong magnet from inside a dead hard drive, and used it to sweep the debris to pick up the drill bits.

It’s scary what you can do with sandpaper

We all know what sandpaper is – right? It’s sand stuck on paper like the Chinese did in the 13th Century – right? Well it’s not that simple. Most sandpaper isn’t sand any more or is it paper either. There’s garnet, aluminium oxide in resin, silica carbide and so on. Then there’s different grits. You can get 36 grit for floor sanders used to flatten cupped floor boards, all the way up to 3000 grit designed for the automotive industry to polish sheet metal on cars to make them smooth enough for paint to go on. You might even be able to get higher grits than that, though you’re now getting into the area of polishing.

You can also use it to sharpen chisels and hand planes and is known as the ‘scary sharp’ method. I have a set of three very cheap chisels – 10 mm, 19 mm and 25 mm. Over the years I have not really looked after them but then I’ve not really been using them for much but chiseling out mortises for door hinges and sitting them in the draw some place. Well now I need to use them a little more frequently but they were dull and had a number of chips on the edge which made them even more difficult to use. I already had an oil stone and a honing guide – this one in fact. I had tried to sharpen the chisels with the stone, but the medium grit is just not agressive enough and I ended up with a divet down the middle of the stone. The chisels were better, but not massively so as I’d not managed to get rid of the chips and dings. Then I found out about scary sharp, and invested in some 320, 400 and 600 grit paper. I already had some 1500 grit paper.

Why use different grits?

General finishes

As you can see from the graphic, the first grit is very agressive and takes a lot of material off, leaving deep grooves. As you progress through the grits you can remove the peaks, leaving a progressively smoother surface. I started with the 320 grit papers and used all three sheets I’d bought levelling out the edges of the chisels. I probably ended up removing 0.25 mm doing just that. A felt tipped pen is very useful at this stage as you can mark the bevel and the back, then do your sharpening to make sure you’re going all the way across the blade. Once I was happy that I’d straightened the edges of the chisels I moved onto the higher grits, progressing from one grit to the next once I was happy I’d smoothed the surface.

Whilst using the papers I would periodically blow off the steel filings and then use a magnet to pick off the finer dust. I could have used water as a lubricant, but I’d taped the sand paper to some plywood and I was concerned the water would start to de-laminate the plywood as I worked.

The oil stone came with a honing guide. This allows me to hold the chisel or hand plane blade at a fixed angle, typically 25º. Many experienced (i.e. not me) woodworkers can hold the chisel at that angle by hand but it’s a skill I’ve not practiced.

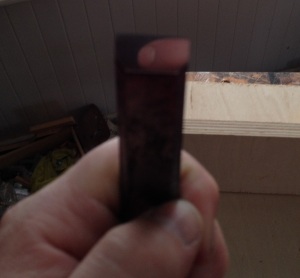
As you can see below you can now see the reflection of my finger holding my iPhone, in the bevel of the 19 mm chisel.

Reflection in chisel

Now all I need to do is use the fine side of my oil stone, and put a micro bevel (also known as a secondary bevel) in the edge. A micro bevel is typically 5º variation of the main bevel, so in this instance 30º. It only takes a few swipes on the fine grit to establish this edge but adds durability to the edge of the blade.